How to set up eSIM on your new iPhone 14
Apple has had support for eSIM since the iPhone Xs/XR, but this year it is going all in by ditching the physical SIM card slot for all iPhone 14 versions sold in the U.S. While models sold in other countries will have support for both physical and virtual SIM, Apple could eventually remove the SIM slot in more countries depending on availability. The precise instructions vary from region to region. For this guide, we’ve focused primarily on the U.S. market.
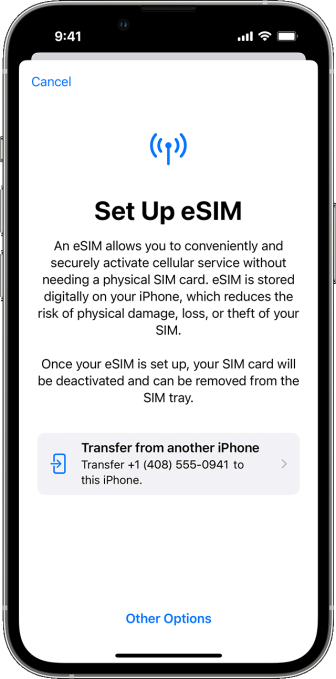
ESIM is a substitute for a physical SIM that’s embedded in the phone’s circuitry so users can easily swap between SIMs. It also enables people to host more than two SIMs. The iPhone 14 will be able to host up to eight SIMs at once. So, how easy is it to load a new eSIM on the iPhone? It should only take a few steps.
Here’s how to do it:
- Go to Settings > Cellular > Add Cellular Plan. Alternatively, this setting could be under Settings > Mobile Data > Add eSIM.
- You will see a bunch of numbers on display to transfer the plan. Otherwise, you can manually select the “Transfer from Nearby iPhone” option. Both iPhones have to be on iOS 16 for this to work.
- Instructions on the old model will help you through this process. Enter the verification code — which will be displayed on the new iPhone — on the older iPhone.
- Once you transfer the plan to the newer iPhone, your Carrier will send you a notification to complete the setup.

Image Credits: Apple
QR code support
- If your carrier has issued you a QR code, you can simply select “Use QR Code” while setting up the new iPhone or use the camera.
- In some regions, you can find the “Use QR Code” option under Settings > Mobile Data > Add eSIM.
Converting physical SIM
Some carriers might support quickly converting the physical SIM to eSIM without having to visit a store. For that, you can go to Settings > Cellular and select Convert to eSIM and then tap on Convert Cellular Plan. After confirming the cellular plan you want to covert tap on Convert to eSIM and wait for it to activate.